DIY Easter wreath: decorating the room for the holiday. DIY Easter wreath made from eggshells and natural materials Wreaths made of artificial flowers for Easter
Wreaths, it’s the turn of spring and Easter! This is a very simple tutorial that I hope will inspire you to decorate your home.

To create my own Easter wreath, I needed the following materials:

Master class on decorating an Easter wreath with your own hands
We cover the foam eggs with gesso primer.
Foam eggs have an uneven porous structure; effort must be made to achieve their smoothness. However, they are very convenient for decorative purposes. Because of their lightness, they will not weigh down the wreath and will easily stick to the branches. I will make a minimalistic decor, and as a result I will use no more than 2-3 pieces of eggs, but if you make a wreath completely covered with eggs, then the weight of the blanks used will matter.
After the primer has dried (about 15 minutes), we sand and sand them with fine-grained sandpaper.

We take different delicate pastel colors of Acrylic-Hobby De Luxe paints and paint the eggs.

My wreath has been woven for a long time. I'll tell you how it's done.
We cut or pick up birch or willow branches from the ground (they bend easily). If the wreath is woven from fresh branches, then it is advisable to break them a little, every 2-3 cm, trying not to tear the bark, so that the branches do not break during weaving. If the branches have already been lying down for several days and have dried out, then before weaving they need to be soaked in very hot water for about an hour, then also broken a little.
We begin to weave a wreath, wrapping each branch around the next one in a circle, holding the tips of the first branches (you can tie them or fasten them with thin wire). At the beginning of weaving, we use the thickest branches, then we braid them with thinner ones.
Then I insert small willow branches into the wreath.

I coat the wreath with acrylic matte varnish. A powder made from polystyrene foam granules will be glued onto it.

I sprinkle polystyrene granules onto the wreath. They are very light and easily stick to the varnish. And, thanks to their lightness, they scatter all over the house :) Therefore, it is better to work with them in some low box. Balls of delicate shades and different sizes... Very reminiscent of sprinkles on an Easter cake!

Between the branches of the willow we insert dry pistachio leaves (I had leftovers from some bouquet of flowers) or other leaves, not necessarily dry.

Add polystyrene foam balls.

Glue foam eggs onto the transparent modeling gel. I only used two - yellow and mint.


That's all! A few steps, no more than an hour of work and a wonderful spring wreath for Easter decor is ready!


Easter is one of the most popular holidays in the life of Christians. There are many rites and rituals that accompany this bright holiday. The Easter wreath is one of the customs, and it is easy to make with your own hands. One of the most necessary and popular attributes is an Easter wreath on the door, which symbolizes eternal life. Its round shape represents the sun, which is the source of light, heat and life. When cleaning and decorating the room with an Easter wreath, along with it comes the belief that the house has been cleaned and joy, love and hope for a bright future will reign in it.
This handmade holiday attribute will be a wonderful gift for your family and friends. The most popular colors of Easter wreaths are white (it symbolizes innocence and purity), red (a symbol of life and love), green (the color of joy and hope).
Easter wreaths are made from a variety of materials: wire, plastic, twigs, cardboard, anything that has a rigid base is suitable. Only the design of the wreath has not been changed; it should have a round shape. After creating a festive wreath, it is decorated with a variety of decorative elements, in the form of flowers, leaves, felt, various spring birds, and, of course, Easter eggs, in general, something that resembles the arrival of spring and new life is used.

An Easter wreath can decorate both the front door and the walls in the room, and even the windows.
We make an Easter wreath with our own hands from scrap materials
We offer you a master class on making a festive wreath from scrap materials. We will use branches from a birch tree as a base. Prepare all the necessary materials and tools:
- thin birch branches with unopened buds,
- any suitable decorative material,
- a little sisal of a suitable color shade,
- satin ribbons,
- hot glue gun.
Before starting work on making an Easter wreath, briefly soak the birch branches in boiling water, so they will become more flexible and pliable when working with them. Choose thin branches; thick ones will easily break when bent.
Now carefully and carefully intertwine the branches together, gradually rolling them into a ring. For convenience, you can use a saucepan of a suitable diameter as a base.
At first the ring will turn out thin and not quite even - no big deal, gradually intertwine the branches together.
Additionally, braid it with a satin ribbon: gradually lifting the wreath, add decorative willow branches and wrap it with ribbon, periodically fixing it with hot glue.
The base for the Easter wreath is ready!
Tie a beautiful bow, roll up a random nest from sisal and decorate it to your liking. Fix all decorative elements with hot glue.

Your festive Easter wreath is ready! You can decorate the room with it yourself.

To work you will need the following:
- wreath - a base of twigs;
- foam or blown chicken eggs;
- napkins for decoupage with a floral pattern;
- soft fabric of pastel color;
- bright ribbon;
- flowers, can be crocheted;
- PVA glue;
- glue gun
Start making your Easter wreath.
First, make a decoupage of Easter eggs. Cut out elements from paper napkins that you will use to decorate the egg: flowers, leaves or curls. Then take the egg, apply the flower and apply a layer of glue on top with a brush. Apply the glue in a thin layer and smooth it out so that there are no uneven spots. Do this with all the eggs and set aside until completely dry.

Meanwhile, work on the main part of the wreath. Cut the fabric into strips. The width of the strips should be twice the width of the wreath rim. Then fold the strips in half and assemble them using a needle and thread, as if stringing them together. And secure them to a wreath base made from branches. Do this with all the stripes. Determine the quantity based on the diameter of the decoration.
When the wreath is completely trimmed, we begin decorating. From a bright ribbon, in our example it is red, we form flowers and sew them onto the wreath.

Also, the eggs have already dried and now use a glue gun to symmetrically glue them to the wreath. Finally, you can decorate with decorative flowers. Make a loop at the back and your door decoration is ready.
Thematic video on the topic of the article
We offer you to watch several videos on the topic of the article. Enjoy watching!
First, a little about the symbolism of the wreath. The Easter wreath, personifying eternal life, is one of the symbols of the Easter holiday. Its very round shape contains the concept of eternity and infinity, plus it refers to the image of the sun, which returns nature to life every spring. The flowers and leaves that decorate the wreath carry the same meaning. An egg is a symbol of the miracle of birth, a hare or rabbit - fertility and prosperity.
You can decorate the door with wreaths, both the entrance door and the door in the room; you can hang the wreath on the wall, on the window, or put it in the center of the table instead of a bouquet. Also, an Easter wreath, especially one made by yourself, can be a wonderful gift for the holiday. Here are a few simple ways to make an Easter wreath and ideas for its design.
Wreath based on twigs: master class
This wreath is made from artificial, imitating natural, willow leaves and flowers. Select them so that there is a flexible wire inside, this will make it easier to form a bouquet.
For this wreath you will need:
- a round blank for a wreath made of branches (sold in florist and handicraft stores);
- artificial branches with leaves and flowers (you can buy them there);
- ribbons for decoration.
1. Wrap the workpiece with branches and leaves.

Photo: thehappyhousie.porch.com
2. Add branches with flowers.

Photo: thehappyhousie.porch.com
3. Tie the wreath with ribbons.

Photo: thehappyhousie.porch.com
Options for wreaths made of artificial flowers on a blank of branches:

Photo: timewiththea.com

Photo: giselagraham.co.uk

Photo: mycraftyspot.com

Photo: forchee.com
: 33 ideas
Wreath on a three-dimensional basis with a nest and flowers made of fabric: master class

Photo: blog.consumercrafts.com
For such a wreath, it is better to prepare tree branches in advance by placing them in water so that the buds have time to open slightly. However, the wreath will look good even without this.
You will need:
- a voluminous round blank for a wreath (sold in florist and handicraft stores);
- several foam plastic blanks in the shape of eggs (you can buy them there);
- artificial flowers made of fabric (sold there; if you wish, you can make them yourself from fabric, buttons and wire);
- a nest made of dry grass;
- ribbon;
- paints - blue and bronze colors;
- glue;
- wire;
- nail pins.

Photo: blog.consumercrafts.com
1. After pinning the beginning of the ribbon, wrap it around the base for the wreath. Also secure the end of the tape with pins.


Photo: blog.consumercrafts.com
2. Place foam eggs on toothpicks, place on a base (such as an egg carton), paint and let dry. Dip a dry brush into bronze paint and make speckles on them.


Photo: blog.consumercrafts.com
3. To fasten the branches into a bundle, you can use wire. Then pin the branches to the base in several places.

Photo: blog.consumercrafts.com
4. Use glue to secure the colored eggs in the nest. Then attach the nest itself to the branches with wire.

Photo: blog.consumercrafts.com
5. Decorate the branches with fabric flowers.

Photo: blog.consumercrafts.com
6. Don't forget the ribbon loop on top - you'll hang the wreath on it.

Photo: blog.consumercrafts.com
Options for wreaths on a volumetric basis:

Photo: blog.consumercrafts.com

Photo: the36thavenue.com

Photo: flamingotoes.com

Photo: oakcityfolk.com
Wreath of live or artificial roses: master class
You can make such a wreath using both fresh and artificial flowers. A wreath of fresh roses will not please you for so long, but it looks much more impressive. Bonus - great scent.
Photo: ashandcrafts.com
You will need:
- a wreath blank woven from branches (sold in flower and handicraft stores);
- several branches of live or artificial bush roses.
1. Trim the rosebuds, leaving a stem a few centimeters long.

Photo: ashandcrafts.com
2. Insert the stems into the base at right angles to form a wreath.

Photo: ashandcrafts.com
Options for rose wreaths:

Photo: laurenconrad.com

Photo: rachelelizabethcreates.blogspot.com

Photo: shelterness.com
Tulip wreath: master class

Photo: u-createcrafts.com
For a wreath of tulips, you can also use both fresh and artificial flowers. You will also need a wicker wreath base and ribbon.
1. The manufacturing algorithm is the same as in the case of a wreath of roses, only the tulips should have longer stems so that they hold more firmly in the wreath. Insert flowers into the base at an angle, forming a wreath.


Photo: u-createcrafts.com
2. When finished, tie the ribbon around the wreath, making a loop.

Photo: u-createcrafts.com
Options for tulip wreaths:

Photo: thehowtomom.com

Photo: fromthefamilywithlove.com

Photo: polkadotchair.com

Photo: southerncharmwreaths.com
Unusual garland:
Unusual Easter wreaths
An Easter wreath doesn't have to be traditional.You can make a wreath, for example, from a hoop: 
Photo: kenarry.com
Or from plastic eggs: 
Photo: crazylittleprojects.com

Photo: u-createcrafts.com
From small toys, for example, rabbits:

Photo: electricallyvintage.com

Photo: triedandtrueblog.com
...or fluffy chickens:

Photo: craftaholicsanonymous.net
You can add birds sewn from fabric:

Photo: helenphilipps.blogspot.com
The wreath may not have the usual shape:

Photo: sprinklesomefun.com

Photo: cheeriosandlattes.com
...and not even be a wreath at all.

Photo: 3littlegreenwoods.com

Photo: homemademodernblog.com
Master class on making an Easter wreath from scrap materials step by step with photos
How to make and decorate a wreath for Easter with your own hands. Step-by-step master class with photos
teacher of additional education Novichkova Tamara Aleksandrovna MBU DO Lesnovsky House of Children's Creativity.Description of work: The master class is intended for children of primary school age, educators, additional education teachers, and parents.
Purpose: A homemade Easter wreath will create a festive atmosphere for the great holiday of Holy Easter, decorate the room and become a talisman that will protect you from evil spells and bad people.
Target: making an Easter wreath for Easter.
Tasks:
- learn how to make and decorate a wreath from scrap materials, choose the right colors;
- improve skills in working with materials and tools;
- develop children's creative abilities and imagination;
- introduce the traditions of preparing for Easter;
- cultivate hard work and accuracy.

Materials and tools:
Thick cardboard;
- yellow viscose napkin;
- green crepe paper;
- terry green foamiran;
- sisal, willow branches;
- wide satin ribbon;
- glue gun, glue stick;
- ruler, pencil;
- scissors;
- decorative items.

Step-by-step execution of the craft.
Draw two circles on thick cardboard. I used two plates. The diameter of the small circle is 15cm, the large circle is 25cm. You can decide for yourself what size your wreath will be.


Before starting work, repeat all safety rules with cutting tools. Cut it out. The inner circle is more convenient and easier to cut with a stationery knife. If you have small children, prepare the base in advance.

Cut a 2 cm wide strip from a roll of crepe paper and begin wrapping the base of the wreath. We will fix the beginning of work using a glue stick.


The base is ready. The green color was not chosen in vain. It symbolizes rebirth and hope for the best.

Let's start making flowers from yellow viscose napkins. After all, with the onset of spring, the first flowers to appear are coltsfoot flowers, dandelions. They look like a little sun. So we will try to make our flowers look like the sun. Lay out the napkin and measure out strips 8cm wide.

Cut the napkin into even strips.

We take a strip, fold it in half, and so that the edges do not diverge, we glue them together. We begin to make narrow cuts from the side of the bend, not reaching the edge 1 cm.

Lubricate the edge of the finished strip with glue and begin to twist it tightly.


The result is this fluffy yellow flower.

We make five of these colors.

We draw a five-petal sepal by hand on terry foamiran and cut it out. You can take any material that is at hand. If it is difficult to draw a sepal, you can use a template.


Glue the flowers to the sepals.

Glue the finished flowers to the base of the wreath. And again, the choice is yours. You can make more flowers and glue them at your discretion. Try it, fantasize.

Let's make a bow. You can simply tie the ribbon in a bow. Glue to the wreath.


We make a nest from sisal, glue on a chicken and an egg. We find a place for the nest and glue it. Add willow branches to the composition. The willow, a symbol of spring and fertility, has become the personification of health, joy and life.


We hang the wreath on the wall and evaluate our work.

You can add a decorative egg.

And these are the works of my students. This is their first year in the Needlewoman association. (7 – 10 years)


A DIY Easter wreath is an integral part of your holiday decor. It is created from various kinds of materials and placed on a door or wall. In addition, there are types of wreaths that are used both as a gift and for serving a festive table.
History of tradition
The Easter wreath is an ancient symbol meaning eternal life and infinity. It is also associated with the image of the sun, which gives life-giving warmth to all people. Easter wreaths are used as decoration for family feasts. They are placed in the center of the table, and freshly baked Easter cake and colored eggs are placed inside. It is also common to see a wreath on the front door on Easter Eve. It symbolizes that the owners of the house will be glad to see new guests and will receive them with cordiality and kindness.
Previously, wreaths were used only to decorate rooms at Christmas, but now they have become an integral element of all possible holidays. It is believed that if you put positive messages into them at the energy level, they will become a real talisman against evil influence.
What can you make an Easter wreath from?
The basis for a DIY Easter wreath can be cardboard, branches, wire and even newspapers. Willow twigs are often used. They bend easily and do not break, so it is comfortable to work with them. A wreath made of willow twigs looks like a nest and symbolizes homeliness.
Also, to create a product with your own hands, foam rings are used - this is an almost ready-made base for a wreath. However, to save money, you can make a circle from cardboard trays intended for transporting and storing eggs. As a rule, during Easter they are always at hand.
Advice! To make the twigs or any other branches used more flexible and pliable, they need to be soaked for half an hour in hot water.
DIY Easter wreath ideas from scrap materials
When creating an Easter wreath with your own hands, you need to be creative and careful. Perseverance is also equally important, since making complex compositions usually takes a lot of time. Below are interesting ideas and variations of Easter wreaths of different categories of complexity.


How to make an Easter wreath with your own hands: master classes
Below are master classes on how to create Easter wreaths with your own hands from improvised materials, as well as purchased ones. At the end of the work, the finished products are decorated with feathers, plastic eggs, fresh flowers, decorative figures, ribbons and eggshells.
Simple Easter Yarn Wreath
List of required materials and tools:
- glue gun;
- lace;
- green yarn;
- plasticine;
- scissors;
- threads for knitting in three different colors;
- 2 brown dense threads of different shades;
- satin ribbon;
- foil;
- matches.
Step-by-step instructions:
- First you need to make the base. Knead the plasticine and place it in a container of hot water for 5 minutes. This will make the material more pliable. Next, a ring is sculpted, the diameter of which should be 22 cm.

- Plasticine can stain the yarn, so the prepared ring is wrapped in foil intended for baking food.

- Next, the base is wrapped with grass yarn. The threads must be placed tightly to each other. There should be no gaps.

- Lace ribbons are divided into individual flowers. You will need 12-20 of them, depending on the size of the lace. It is advisable to use several different tapes.

- Next, the flowers are attached to the yarn using a glue gun and left to dry.

- While the base for the Easter wreath is drying, you need to tie the basket and eggs. Using colored thread, tie 2 air loops. 6 single crochets are knitted into one of them and the ring is closed. The next row should consist of 12 similar columns. In other words, each loop needs to be knitted with 2 stitches.

- Next, knit 2-3 rows without adding loops. When most of the egg is formed, you need to gradually reduce the number of columns. At the end, the thread is secured and pulled to the base. You need 3 of these eggs.

- Sewing brown threads are connected and 2 loops are made. 6 stitches are knitted into one of them. Then, as you knit, the number of stitches increases. When the bottom of the basket reaches the desired diameter, knit 1 double crochet and 1 more without it.

- Eggs are sewn onto the finished product.

- The knitted basket is glued to the base using a glue gun.

- A satin ribbon is threaded through the wreath and tied into a bow. The excess is cut off with scissors and the edges are singed.

Advice! If foil is not on hand, then cling film or a cut bag will do as a substitute.
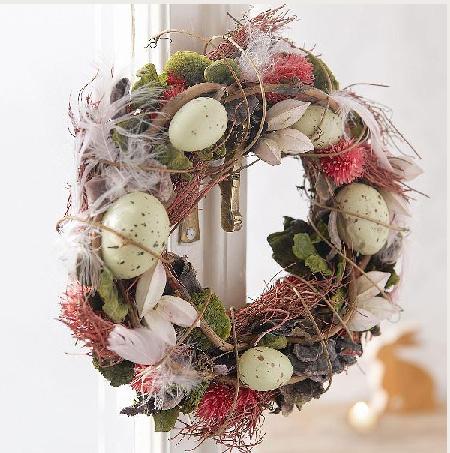
Wreath made of twigs and eggs
Required materials and tools:
- dried or artificial flowers;
- hollow eggshells from quail eggs;
- hay;
- glue gun;
- birch or willow twigs;
- feathers;
- willow branches;
- decorative wire.
Instructions for creating a wreath:

Easter wreath with paperclay eggs
List of required materials and tools:
- paperclay;
- skewers;
- birch twigs;
- aerosol can;
- acrylic brown paint;
- acrylic paint of different colors;
- brown pastel;
- glass of water;
- decorative flowers;
- cotton openwork ribbons;
- paint brush;
- cardboard;
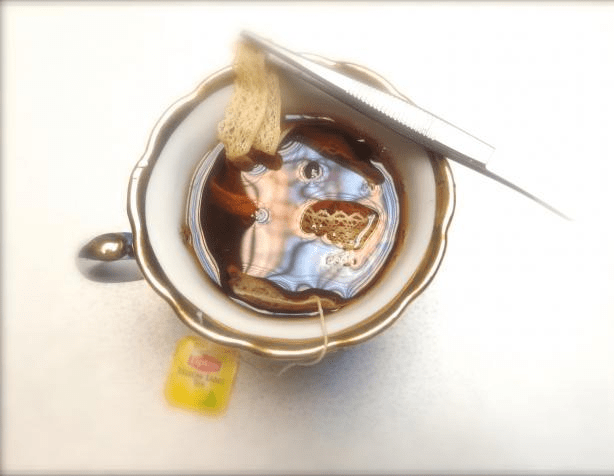
- a bag of tea or a teaspoon of coffee;
- glass beads;
- glue gun;
- newspaper.
Step-by-step instructions:
- First you need to make eggs from paperclay. It is a material for sculpting figures. Paper glue is moistened with water and formed into balls, which are then shaped into eggs. All preparations are placed on skewers or toothpicks. If cracks appear on the products, there is no need to smooth them out. They will serve to create the effect of a cracked egg. The finished pieces are left to dry overnight.

- When the paper glue has hardened, you need to start painting. You can paint eggs with gouache, acrylic or aerosol spray. It is advisable to use gentle and soft tones. To create an Easter wreath you will need 8-14 pieces of blanks.

- The sides of the eggs are tinted using brown pastel, and the skewers are taken out.

- Next, acrylic paints are diluted with water and sprayed onto the workpieces using a brush.

- At the fifth stage of work, you need to create a frame. Newspaper sheets are cut into strips 4-5 cm wide. Then they are crumpled and twisted into thin strands.

- A disk with a diameter of 24 cm is cut out of a sheet of cardboard. Using a glue gun, blanks from newspaper sheets are attached to it. It is advisable to intertwine the bundles with each other.

- The inner and outer edges of the cardboard disk also need to be framed with a rolled piece of newspaper.

- The base is coated on both sides with brown acrylic paint.

- Next, the birch twigs are threaded between the strands with the thick end first. It is advisable to take the thinnest and most easily bending branches.

- Then they start decorating the base. Strong tea or coffee is brewed and lacy ribbons are placed into the glass. As soon as they acquire an aged appearance, they need to be dried and also woven into an Easter wreath. All manipulations are repeated with artificial flowers. To ensure that the blanks keep their shape, they are coated with PVA glue.

- At the final stage, eggs, beads, moss and flowers are attached to the DIY Easter wreath using a glue gun.


Important! Paper glue can be replaced with ordinary colored plasticine or clay used for modeling
DIY Easter wreath from egg trays
List of required materials and tools:
- artificial or fresh flowers;
- decorative wire;
- egg carton;
- scissors;
- glue gun
Instructions for creating a wreath:

How to decorate an Easter grass wreath
The main symbol of the holiday is Easter eggs, so they must be present in the wreath. However, it is customary to use decorative analogues. Real eggs will add weight to the wreath. The simplest and cheapest substitute is eggshells. You can also decorate the product with figures or drawings of a rabbit, chicken and hen.
Flowers and willow branches with unopened buds will look beautiful on Easter wreaths made from grass. They symbolize spring, as well as the resumption of life. In addition, it is customary to use satin ribbons. They cover imperfections in the form of joints and empty spaces on the wreath. Also, the ribbon will give the product a more festive and solemn look.
It is customary to use bright colors of paint. The predominant color in Easter wreaths is green. It is a symbol of the rebirth of nature. They also use red shades, which are associated with life that has overcome death, and blue shades. In general, the composition should include many different cheerful colors.
Advice! To get an eggshell, you need to pierce the egg at the top and bottom, and then blow out the contents. The finished base is coated with paints or decorated using the decoupage technique.
Even after fully studying the master class, an inexperienced person will encounter a number of difficulties and questions when working. Expert advice to help simplify the task and avoid mistakes:
- When creating an Easter wreath with your own hands, it is better to use peeled willow branches. After some time after cleaning, they acquire a beautiful golden color. To peel the branches, you need to boil them for 2 hours, and then use a squeezer or knife to remove the peel.
- The foam elements and base must be painted. To do this, it is better to use paint, ink or a marker. However, you must first coat the foam with a primer. It will prevent paint from being absorbed and will also make its porous surface smoother.
- Before you pierce an egg to blow out the contents, you need to stick a piece of tape or adhesive tape on the top and bottom of it. This will prevent many small cracks from appearing around the puncture site.
Important! You need to clean the rods while they are wet. In order to avoid drying out, they are placed in water at room temperature.
Conclusion
By making an Easter wreath with your own hands, you can get a beautiful and extraordinary decoration for your home that will not only surprise guests, but also create a festive atmosphere. Making it will not take much time and will give you a lot of pleasant emotions. Creating a wreath is a fun activity during which you can show your imagination and signature style.


